How to Color Grade in CapCut APK | Learn A-to-Z Guide
Transform your videos from flat to cinematic. This complete guide breaks down the art of color grading in CapCut, from basic correction to professional HSL adjustments.
Correction vs. Grading: What's the Difference?
Before diving in, it's crucial to understand the two stages of color manipulation. They are often confused but serve very different purposes.
Color Correction
This is the technical process of fixing problems. The goal is to make your footage look as natural and true-to-life as possible by balancing colors, exposure, and contrast. Think of it as creating a clean canvas.
Color Grading
This is the creative process of styling your footage. After correcting your video, you apply a grade to create a specific mood, atmosphere, or cinematic look. This is where you add your artistic touch, often using blur effects to complete the look.
Why Color Grading is a Game-Changer
Create a Mood & Atmosphere
Use color to evoke emotions—warm tones for nostalgia, cool tones for suspense, or vibrant colors for energy.
Achieve a Cinematic Look
Emulate the color palettes of professional films to give your videos a high-end, polished feel.
Enhance Your Storytelling
Guide the viewer's eye and reinforce themes by associating specific colors with characters or ideas.
Establish a Brand Style
Maintain a consistent visual identity across all your videos with a signature color grade.
Step-by-Step Guide to Color Grading in CapCut
Follow these four steps to take your footage from raw to remarkable.
Step 1: Basic Color Correction
Before grading, you must correct. Select your clip, go to 'Adjust', and use the basic sliders. Your goal is a balanced, natural-looking image. Focus on 'Brightness', 'Contrast', and 'Saturation'. This creates a clean canvas.
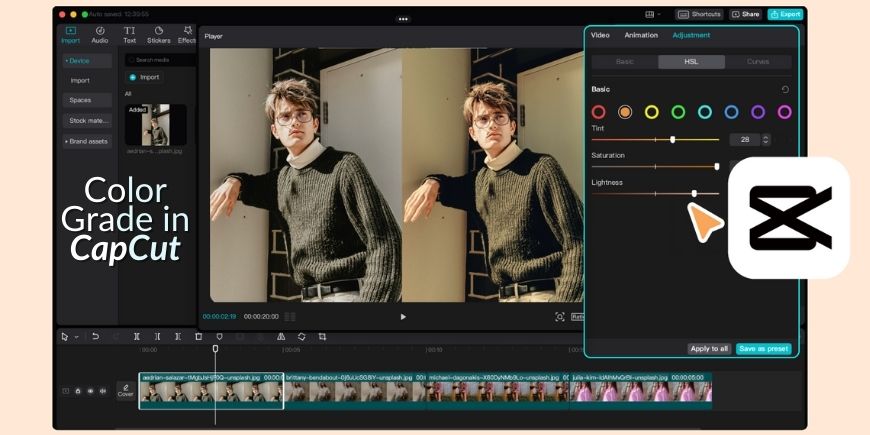
Step 2: Use the HSL Tool
HSL (Hue, Saturation, Luminance) is your most powerful tool. It lets you adjust individual colors. Want a richer blue sky? Select blue and boost its saturation. Want to make a red pop? Increase its luminance.
Step 3: Apply Filters (LUTs)
CapCut's 'Filters' act like LUTs (Look-Up Tables) and are perfect for applying a specific style. Find a filter that matches your desired mood (e.g., 'Oppenheimer' for a vintage look) and apply it. You can adjust the intensity to be as subtle or strong as you like.
Step 4: Final Adjustments
After applying a filter, you may need to make final tweaks. Go back to the 'Adjust' panel. Use tools like 'Vignette' to draw focus, 'Temperature' to warm up or cool down the scene, and 'Sharpen' to add crispness.
Pro Tips for a Cinematic Look
Use Reference Images
Check Skin Tones
Create a Preset
Frequently Asked Questions
Related Guides
Color Pop Effect Guide
Learn how to isolate a single color in your video for a dramatic effect.
Cinematic Blur Effects
Complement your color grade with professional blur and focus effects.
Ready to Master Color?
Download the CapCut Pro APK to unlock all advanced adjustment tools, premium filters, and export your cinematic creations in stunning 4K.